Note: This page has been retained from the previous site as a convenience to former accessors. This page is not maintained.
Click here to return to the home page.
Note: This page is an updated version of the original page, dating back to 2003 which may be found here.The pictures on this page are more
detailed than the earlier version, although the process is unchanged.
You may click on any thumbnail image to view a larger picture.
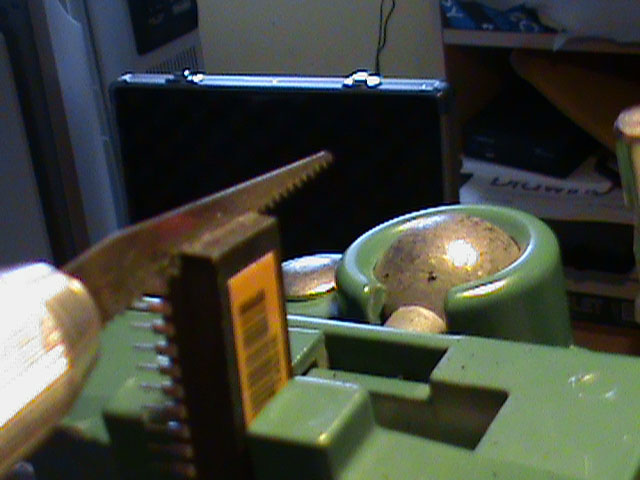
 The first step in repairing the NVRAM chip is to
locate and remove the chip from the system. It can be identified ( usually ) by the orange bar-coded label on the top.
The first step in repairing the NVRAM chip is to
locate and remove the chip from the system. It can be identified ( usually ) by the orange bar-coded label on the top.
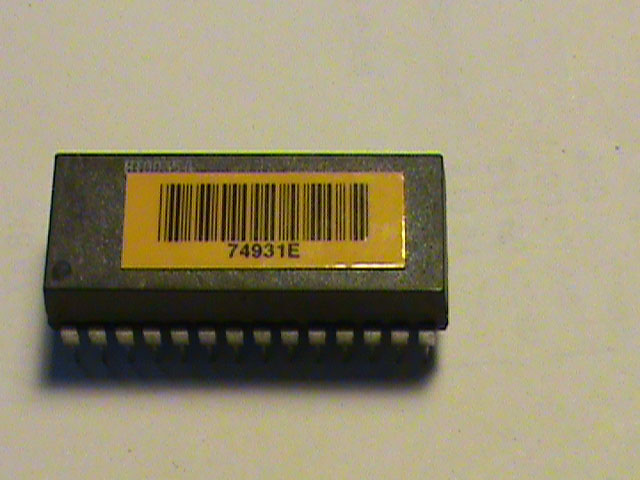 Be sure to note the index "dot" marking
pin 1 of the chip package. You will be working on the opposite end of the package.
Be sure to note the index "dot" marking
pin 1 of the chip package. You will be working on the opposite end of the package.
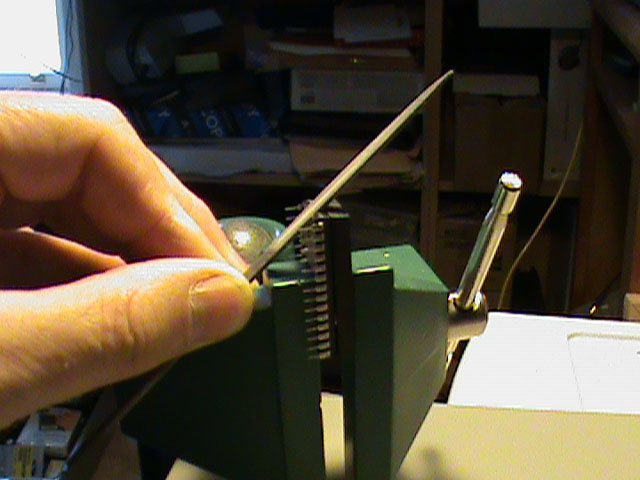 The second step is to file away the DIP package
on the end opposite to the index pin to reveal the power leads which join the top battery pack to the lower RAM chip. A file will do the job, but a small grindstone in a drill or
a Dremel tool will also work.
The second step is to file away the DIP package
on the end opposite to the index pin to reveal the power leads which join the top battery pack to the lower RAM chip. A file will do the job, but a small grindstone in a drill or
a Dremel tool will also work.
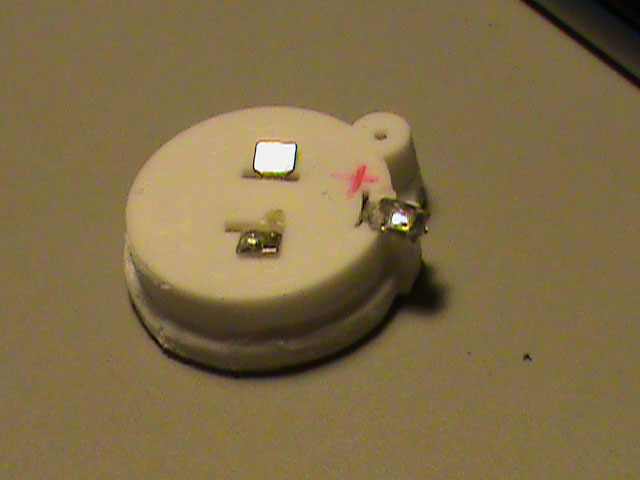
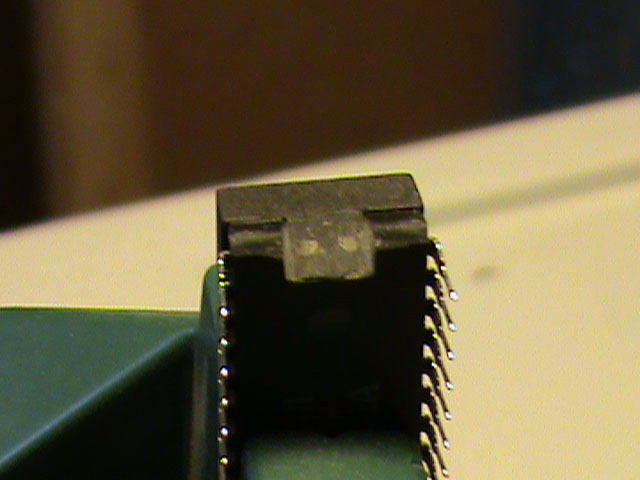 This picture shows the two "pads" where
the new battery will be connected
This picture shows the two "pads" where
the new battery will be connected
.
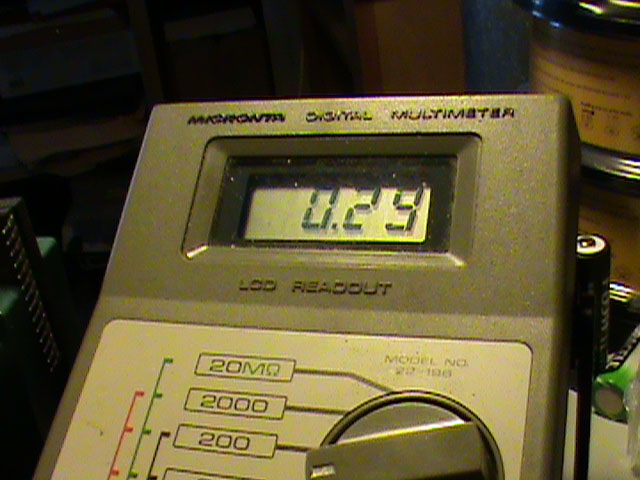 This picture shows the voltage remaining in the
on-chip lithium battery. This internal battery will be disconnected in the next step to prolong the life of the replacement battery.
This picture shows the voltage remaining in the
on-chip lithium battery. This internal battery will be disconnected in the next step to prolong the life of the replacement battery.
 The third step is to saw into the DIP package on
the end opposite to the index pin to disconnect the power leads which join the top battery pack to the lower RAM chip. You only have to cut a slot about 5 mm deep. A small hacksaw
will do the job, but a small cutoff wheel in a drill or a Dremel tool will also work.
The third step is to saw into the DIP package on
the end opposite to the index pin to disconnect the power leads which join the top battery pack to the lower RAM chip. You only have to cut a slot about 5 mm deep. A small hacksaw
will do the job, but a small cutoff wheel in a drill or a Dremel tool will also work.
 I used an LED "tea light" as a source for
my 3V replacement battery and battery pack. This cost under a dollar and will last for years.
I used an LED "tea light" as a source for
my 3V replacement battery and battery pack. This cost under a dollar and will last for years.
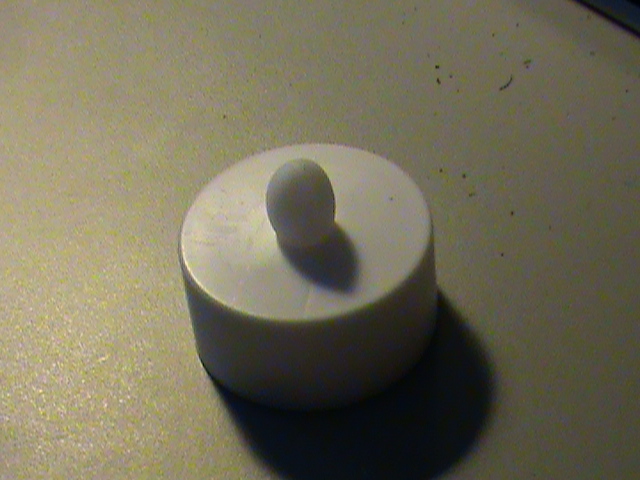
 The fourth step is to reduce the tea light to a
battery pack by filling away the excess plastic.
The fourth step is to reduce the tea light to a
battery pack by filling away the excess plastic.
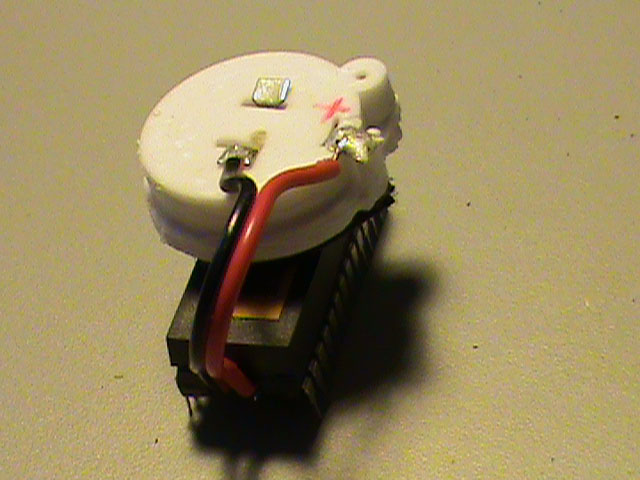
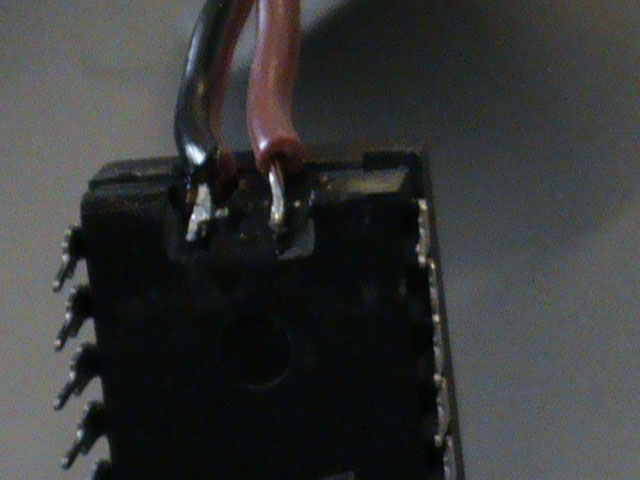 The fifth step is to connect the tea light
battery pack to exposed pads on the chip. Be sure to observe the correct polarity: the positive lead is on the top left side when the chip is oriented with the index ( Pin 1
) in the lower right.
The fifth step is to connect the tea light
battery pack to exposed pads on the chip. Be sure to observe the correct polarity: the positive lead is on the top left side when the chip is oriented with the index ( Pin 1
) in the lower right.
 The sixth and final step is to re-insert the chip
into your workstation, being careful to orient the chip properly. Once complete, you will need to update the MAC address and HostId. If the original values aren't available,
you can find some useful information here.
The sixth and final step is to re-insert the chip
into your workstation, being careful to orient the chip properly. Once complete, you will need to update the MAC address and HostId. If the original values aren't available,
you can find some useful information here.
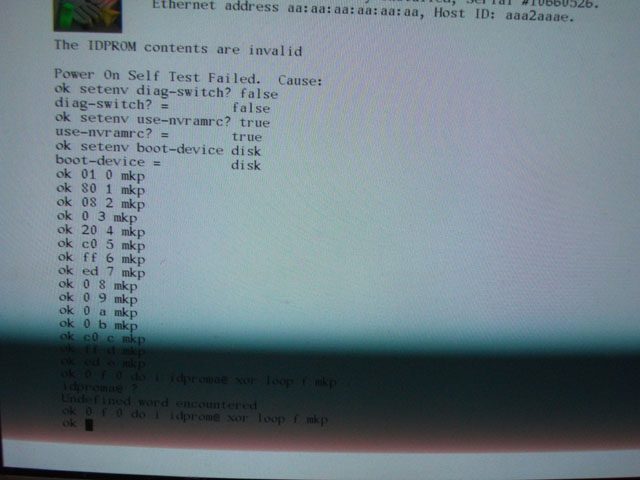 A picture showing the use of the Forth prom
monitor to reprogram NVRAM values.
A picture showing the use of the Forth prom
monitor to reprogram NVRAM values.